
Last Updated on October 26, 2024 by Neil Murray
Table of Contents
Hubstaff #
Make sure you are signed into Hubstaff (if you’re contracted via Hubstaff) and log your time whenever you work. This lets us review your screenshots regularly.
You need to install & use the Hubstaff Desktop App so you can record your time with screenshots – you can’t do this from the browser interface.
We use your screenshots to see what you are working on. This often helps us to give you some guidance on how to tackle a current issue.
We also use this to notice opportunities, problems, errors & misunderstandings in your current work.
Hubstaff Tracking # [Review]
Hubstaff have two time tracking interfaces:
- Web Portal
- Desktop App
As we require screenshots of your work, which the web interface is not capable of taking, you must use the desktop app for time tracking.
You will not be able to track your work from your Hubstaff web portal.
Hubstaff Tracker – web portal – tracking not available
To start tracking your work, download the app and sign in with your Hubstaff account credentials. The app allows you to track time and add and edit tasks and memos. Screenshots are taken automatically at random intervals while your timer is running.

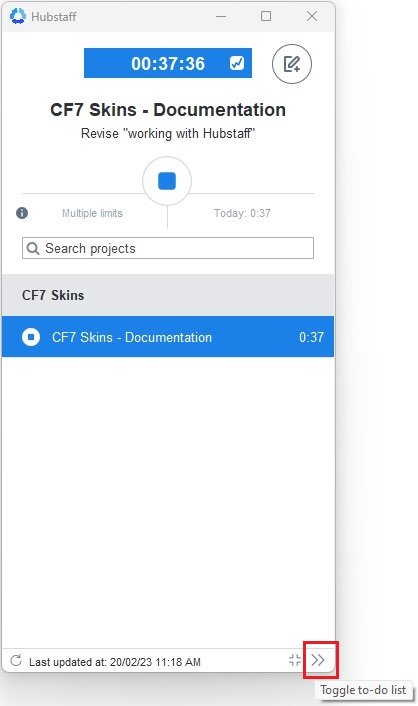
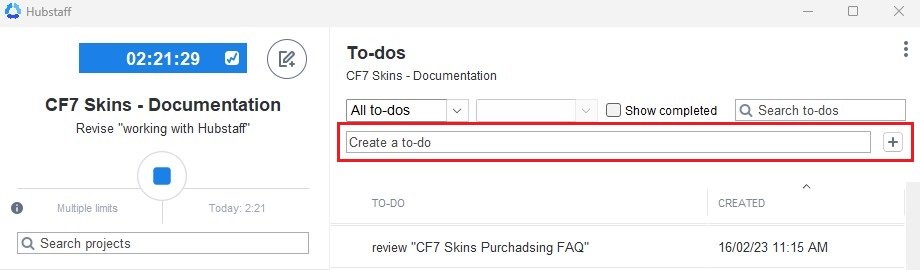
If you don’t see the To-dos list in your app, you can toggle view to expand the app window.
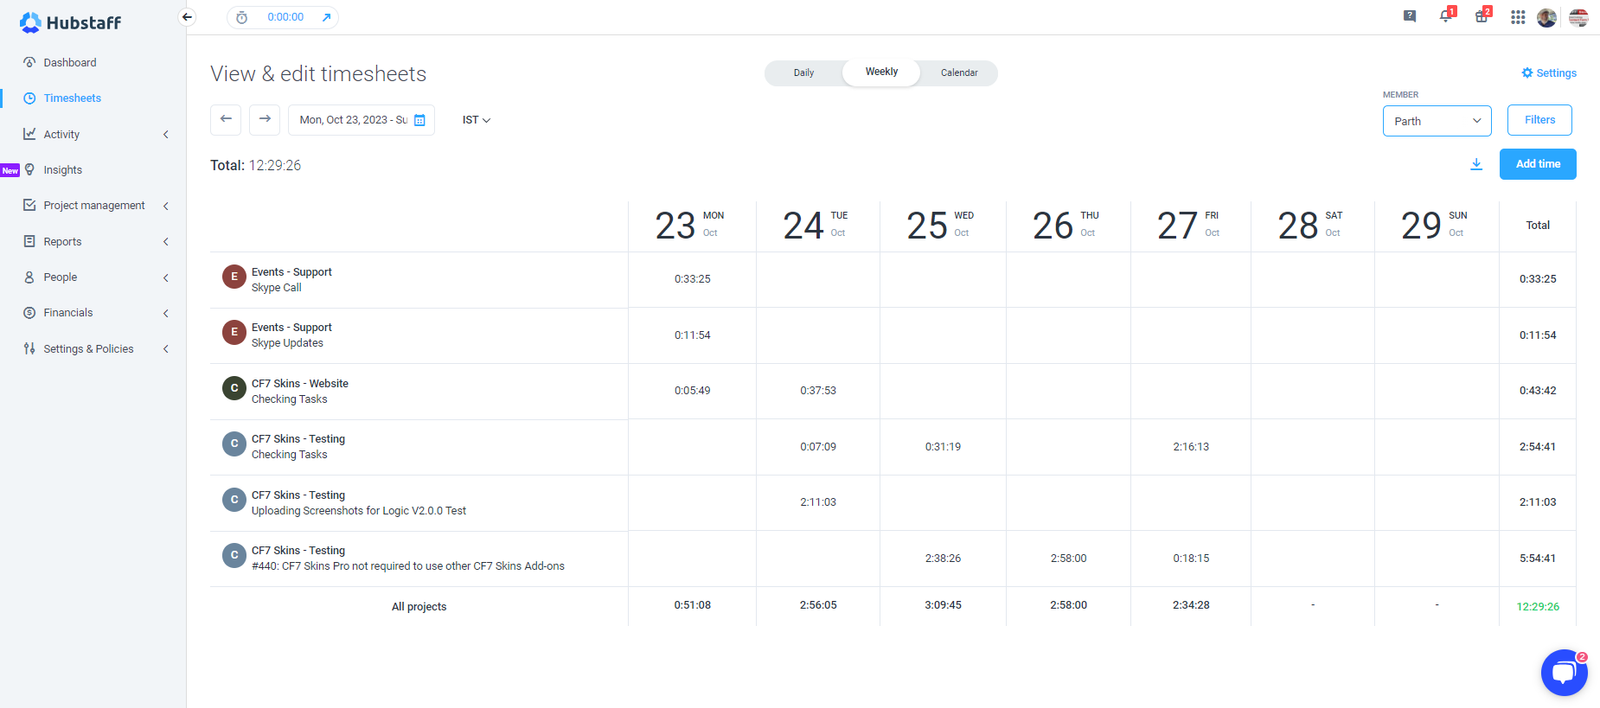
To see your work history, you’ll have to use Hubstaff web portal. The interface allows you to see your logged time, recorded screenshots and other work stats. Take note that data from the app is synced with the web portal after some interval i.e. it will take some time for your progress and activity to be visible on web. Make sure you do not go over the web portal and add details over there manually if you don’t see your app logged details immediately.

Things to remember while logging time:
- Sign in is only required once when you open the app for the first time
- Select the correct relevant project
- Add a new task or select from your previous ones depending on what you are working on
- You can add notes about your task or your progress through the memo button
- If you have multiple screens, all your screens will be included in the screenshots
Hubstaff Tasks #
Make sure you use Hubstaff Tasks to describe what you are currently working on in detail – makes it easier to follow your work.
To create a new task, go to the Create a to-do field, name your task and click the + (add) icon.
Once you have added/selected a task, click Start button to begin tracking. A timer at the top displays your day’s total tracked time. Once you have completed a particular task, click the Complete button below the To-Do list. This will stop the timer and a green check mark will appear with that task.
Good Examples #
Hubstaff Memo #
Hubstaff Tracker allows you to add notes and details about your current task. Follow the steps below to do that.
Click on the Memo button beside the timer.

This opens up a small window where you can write your note.
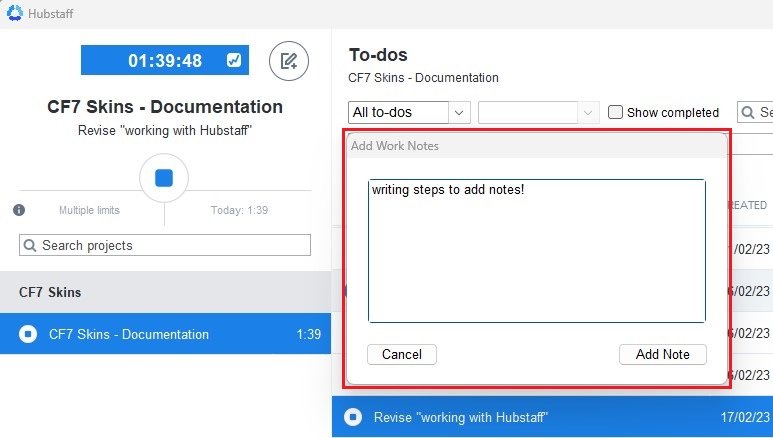
Click on Add Note button to finish. You can add multiple notes to each task.
Daily Screenshots #
Make sure you are signed into Hubstaff and log your time, whenever you work. This lets us review your work regularly.
We use your screenshots to see your progress as well as to judge your ability to execute the assigned tasks. This also helps us to notice opportunities, problems, errors & misunderstandings in your current work, and in guiding you on how to tackle an issue.
Tip: See Working with Hubstaff for details on how to manage and work efficiently with the Hubstaff web portal and desktop app.
Generally, we check your screenshots as follows:
- Trial
- Daily until you show that you work consistently well
- Ongoing
- Weekly (or as required)
- Occasionally when you’ve shown that you work consistently well
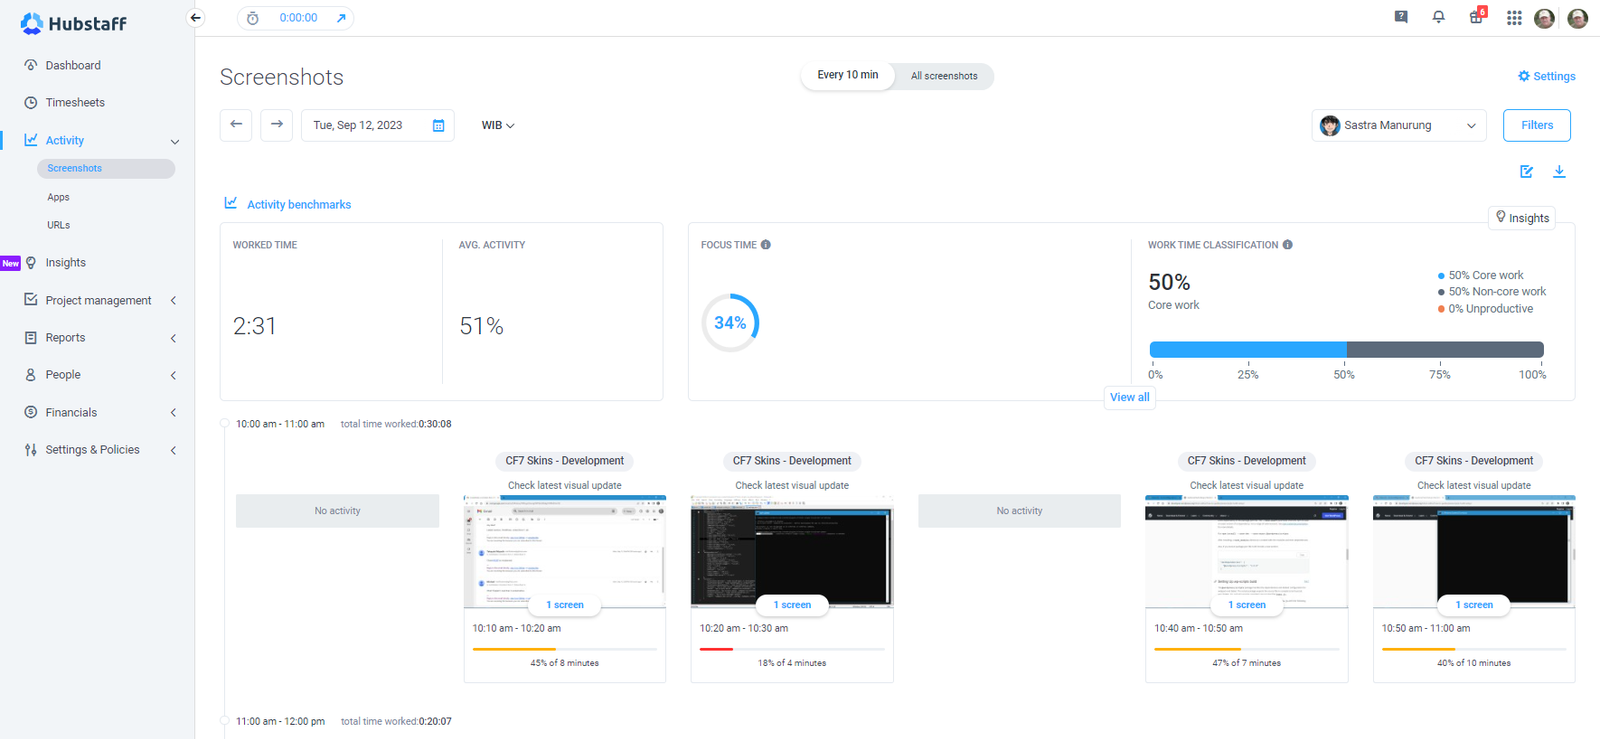
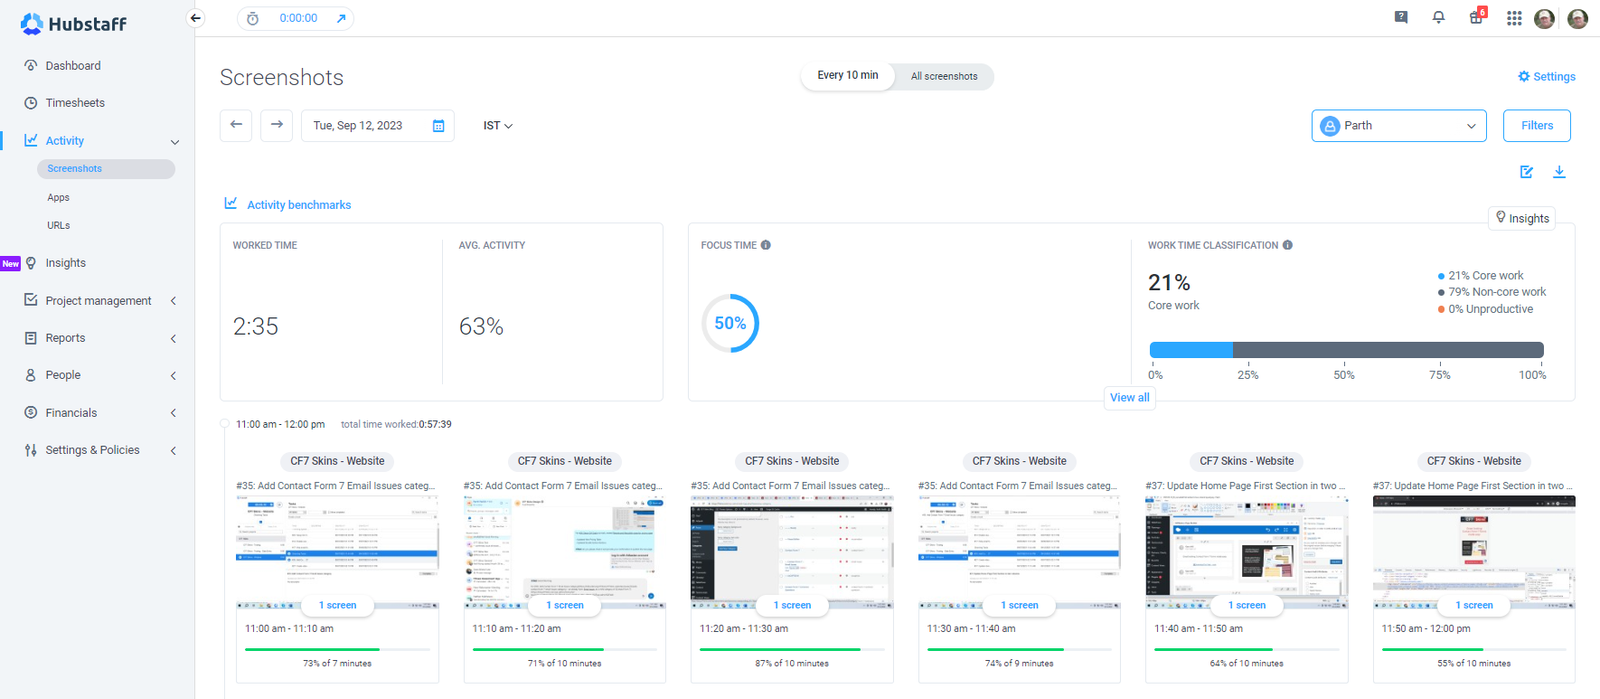
We check that your screenshots and activity, each day, depict an effective contractor working up to his/her set daily time limit. Your logs must show a high activity rate with the progress clearly visible in the screenshots.
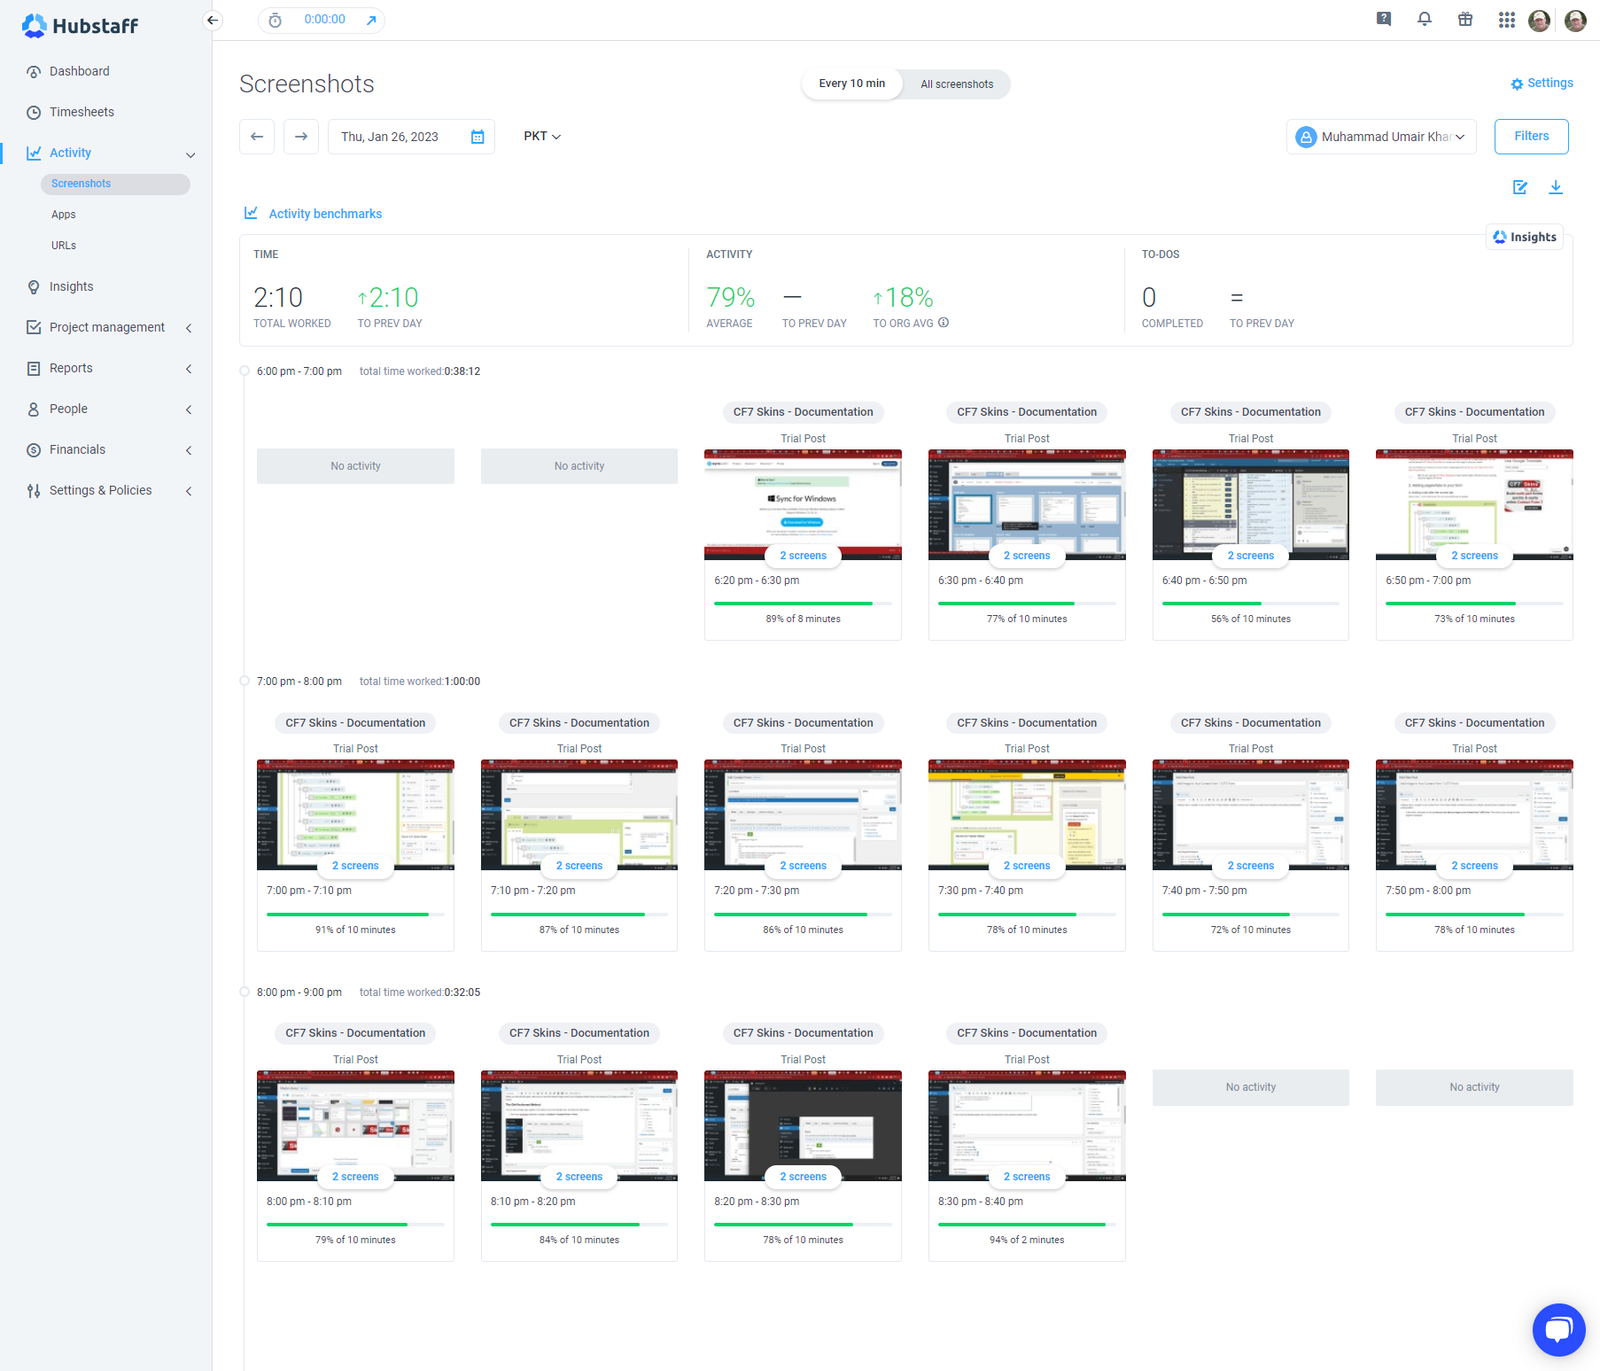
Screenshots from our long term contractors look like this.
We are also on the lookout for records that don’t meet our expectations.
Basic time tracking ethics that you are expected to follow:
- Don’t stretch your work to fit your daily time limit.
- Don’t do bogus activities (random scrolling and typing etc.) to make it look like you are busy.


We keenly check that the maximum daily limit is not abused. If you only have 15 mins of work available, then that is all you should do. If a task isn’t available, you do and record nothing.
If and when we find similar issues, we act swiftly to deal with them.
Points to Remember #
- Use Hubstaff Desktop App for time tracking – NOT the Hubstaff Web Portal.
- Choose the correct Project and Task.
- Use Hubstaff Tasks to describe what you are currently working on.
Further reading:
Notes
ADD add your local time zone in Hubstaff.
Skype Chat 2023-02-18 from Ajith
in my machine the Hubstaff tracker was not showing full screen with all options
Hi Muhammad, This may happen again if you resize the size of hubstaff tracker window. The “complete” button will not be visible if you select a task. And it may happen in future too, changing screen resolution will help you in this scenario.
And to make things clear, you do not have to use both web and desktop(App) interfaces to manage your todo and notes.
Todo feature is used to add a task to your list and track time for it. Once you added a task, then you need to click the small start button near the added task in the list this will start tracking time for the task. Do not try checking web interface for changes instantly and makes changes there, there is an interval for sync between desktop app and web. You may find it difficult to see the Complete button if the window is resized and again you may need to change screen resolution a quick fix.
On the other hand Notes are additional details of work/task you were working on. This can be added any time and not used in time segregation.
It might not be a good idea to add todo and notes after working as this can be time consuming and complicated. Adding Todo and Notes after working may cause wrong data entry as we need to recall the things we were done. Also this might not be suitable for the actual use case of Notes and Todo
The best way will be start adding your Todo first then click on the start button near to it (it will change to stop button) and then add details as notes while you work. Just click on the stop button near your task if you were temporarily stopping the task. else you can click on the complete button below task area once you selected the task (here you may need to apply the screen resolution fix if the complete button is not showing up).
Notes
Save all Images to Sync – use ..\Sync\..\Development\Development Guidelines\Working with CF7 Skins\Working with Hubstaff\