
Last Updated on March 24, 2023 by Neil Murray
Our general practice is to write a post/article on dev site first. Once it’s complete and has been approved, we transfer it to the live site. Follow the instructions below to publish an audited article on a live site.
Before publishing #
- From Content Audit Attributes, make sure the content status is set to Audited.
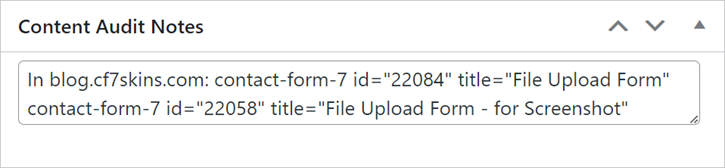
- Make sure the Content Audit Notes contain a reference to all the forms used to create the article. Verify the forms.
- Make sure all relevant images are present inside the post’s corresponding Sync folder. The Sync folder for each article is specified in its relevant Pivotal Tracker story.
Publishing on Live Site #
1. Copy all the content from the dev site to the live site and remove Notes (everything below the <hr /> tag) from the bottom of the article.
Tip: If the content is written directly in the live site, first duplicate it over the dev site. Include the notes, featured image, categories, author, content owner, content audit notes, and all other metadata.
Copying to dev site helps keep record and allows easier edits and updates in the future.

Tip: For articles written directly in the live site, make sure the images are uploaded only to the live site. Live site media library links can be used for the dev site as well. There’s no need to re-upload images to the dev site.
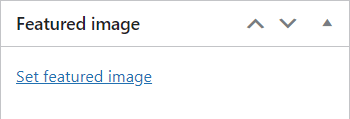
2. Add the featured image.
3. Duplicate Categories, Author, Content Owner, Content Audit Notes and all other metadata. While copying a form reference from audit notes, make sure you specify the website (dev or live) where that form is located.
Tip: Add News to the Categories for articles that are to be published in the blog & sent to our email lists via Mailchimp.
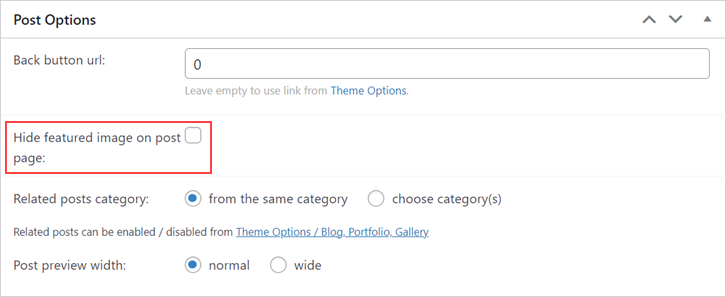
4. Check Hide featured image on post page under Post Options.
This ensures that the email notification of the post’s publishment does not contain the featured image, which improves the email’s structure.
Note: Remember to uncheck Hide featured image on post page after the post’s email notification has been sent.
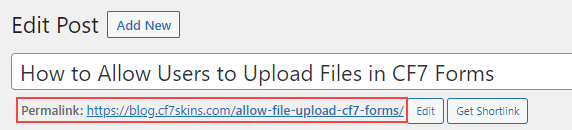
5. Verify the Permalink of the post. Make sure it contains major keywords from the title. Also, make sure it matches the URL in its corresponding Pivotal Tracker story.
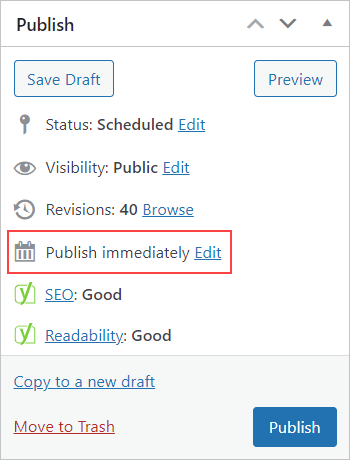
6. Edit Publish immediately to schedule a time to publish.
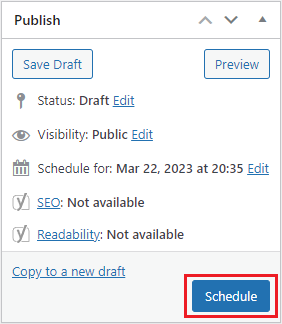
7. Once you have set the date and time, click Schedule. Your post will automatically go live at the marked time.
Tip: You don’t have to publish the article on the dev site. Leave the content as it is, so that all the notes can be used as reference in the future.
Further reading:
Notes:
ADD detailed instructions.
Publish Article – notes from Neil Murray
1a. Copy article to Dev site (if not written on Dev site)
- keep notes
- include Featured image
- include Categories
- copy Author, Content Owner, Content Audit Notes etc.
1b. Copy article to Live site (if not written on Live site)
- Make sure images are on live site
- Remove notes from live site article
- Hide Featured image in Post options – change back after published
- Schedule date
- Add News Category
Save all Images to Sync – use ..\Sync\..\Documentation\Documentation Guidelines\Publish Article\