
Last Updated on May 2, 2024 by Neil Murray
We’re increasingly using Rewrite & Republish which reduces the need to use our development sites.
Rewrite & Republish is used when we do not want to Publish the changes immediately on frontend, it may be due to various reasons like
- It may require longer time to edit the post/pages and can not be edited in one go
- Needs to be Reviewed
- Other reasons
Table of Contents
- Create Rewrite & Republish version of the post/page
- Edit the Post/Page
- Save Changes & Preview Post
- Republish post after confirmation
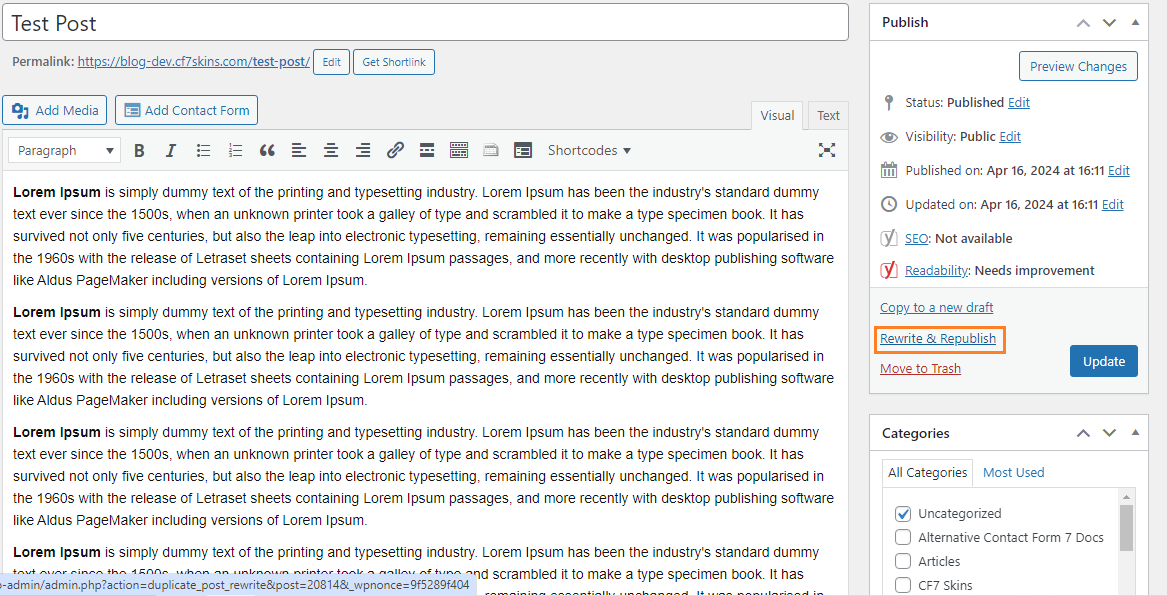
Create Rewrite & Republish version of the post/page #
- Open the post in Edit Mode
- Click Rewrite and Republish from Right side Widget
- Republish version created

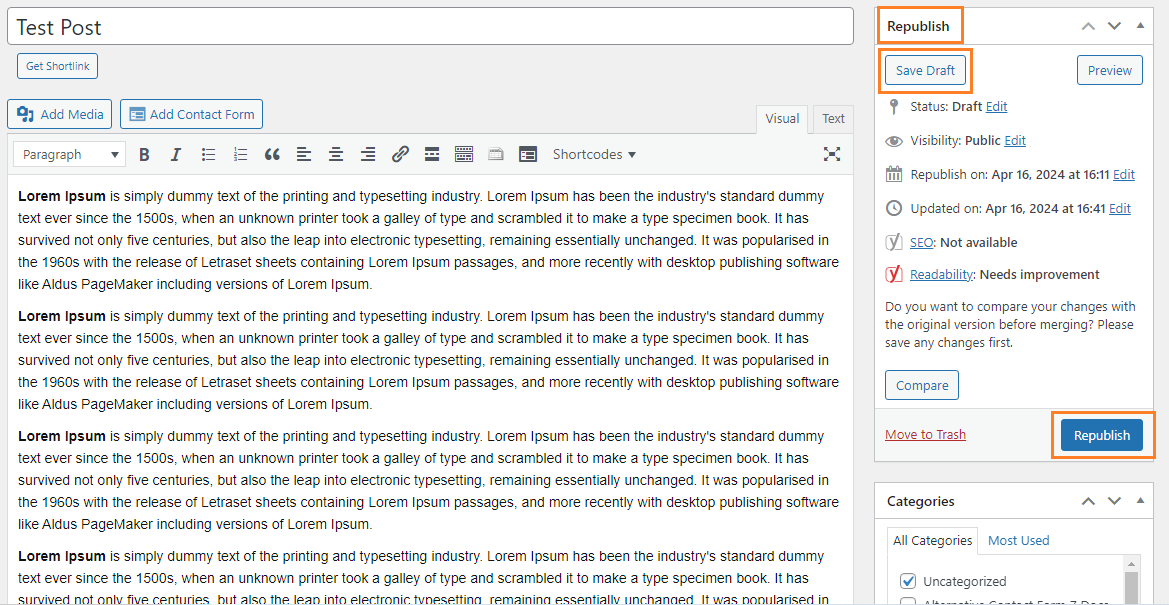
Edit the Post/Page #
- Make required changes to Post/Page
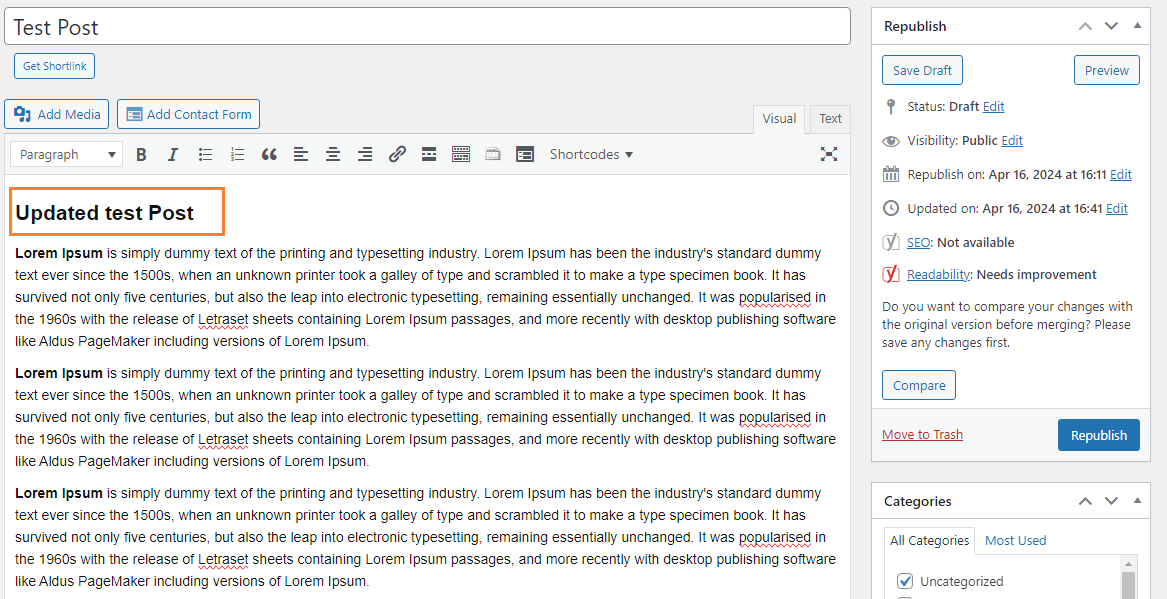
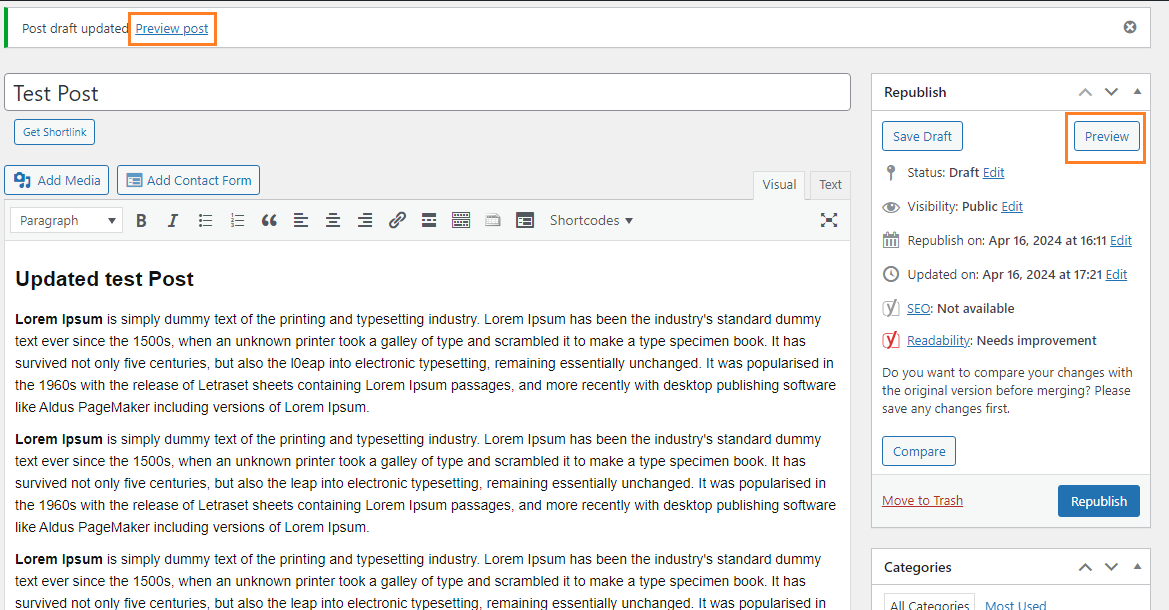
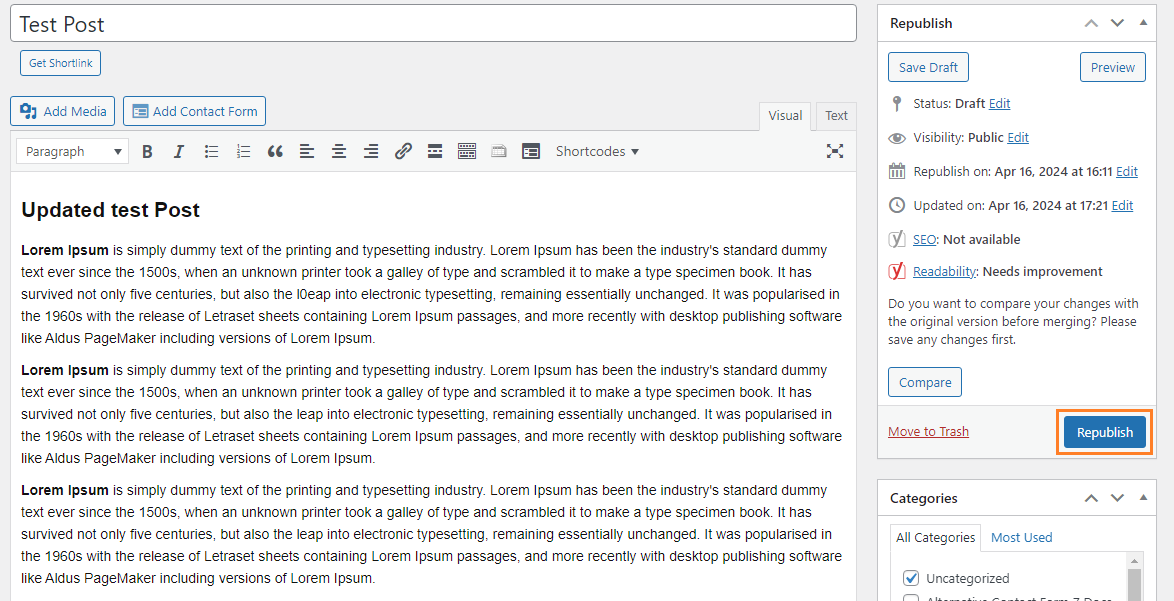
Save Changes & Preview Post #
- Click Save Draft Button
- Draft Saved and Preview link

Republish post after confirmation #
- Click Republish button
- Post/Page Republished
Sequence to use the buttons/links in the WordPress classic editor
If you found it difficult to understand what is the proper sequence to use these buttons/links in WordPress classic editor:
● Rewrite and Republish
● Save Draft
● Compare
● Update
● Republish
Here is a bit clarification about it.
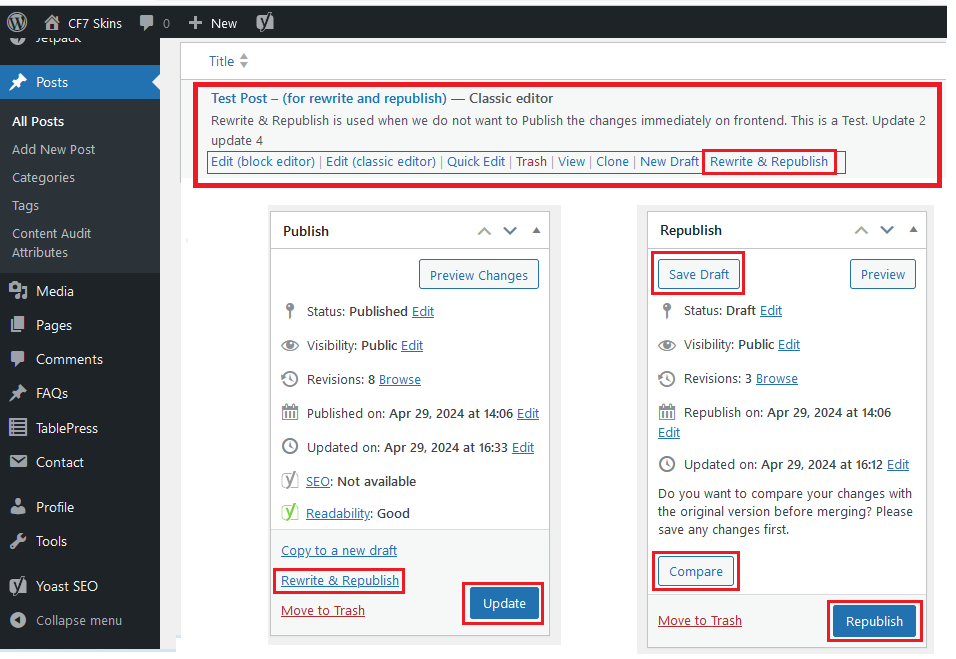
Under all posts, locate the desired post or page, that you want to duplicate, or that you want to make changes in an existing post written by someone else. Here, near the title of the post, you would see a few options:
Edit (block editor) | Edit (classic editor) | Trash | View | Clone | New Draft | Rewrite & Republish
Clone: This option will instantly create a copy of the content.
Rewrite & Republish: This option allows you to duplicate the content and immediately publish it as a new post or page. Use this if you want to make significant changes to the duplicated content before publishing.
This is the sequence to use the buttons/links in the WordPress classic editor:
1- Save Draft:
Before making any changes, its advisable to save a draft of the original post/page. This ensures that you have a backup of the content before proceeding with any modifications.
2- Compare:
If you are reviewing someone else’s post or you have received feedback on your own post, use the “Compare“ option to understand the changes made. This help you identify any revisions or modifications that have been suggested or implemented.
3- Rewrite & Republish:
If you are ready to make significant changes to the content and want to publish the revised version as a new post or page, use the “Rewrite & Republish“ option. This creates a duplicate of the original content with your revisions and immediately publishes it on the frontend.
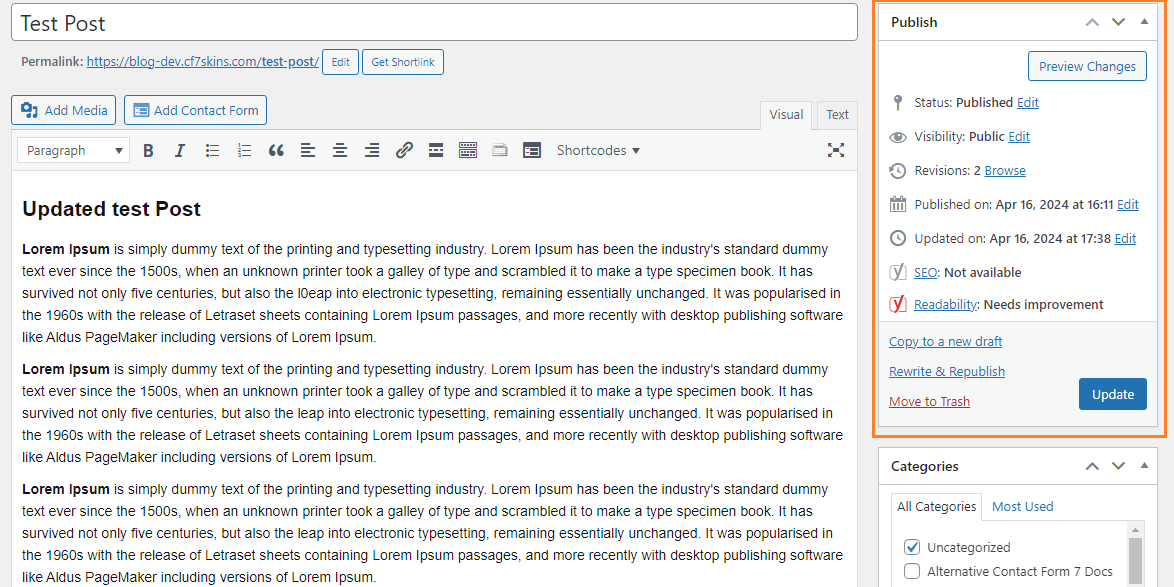
4- Update:
After making edits to the duplicated content, use the “Update“ button to save the changes without publishing them immediately. This allows you to refine the content further or review the modifications before publishing them on the frontend. Update is similar to “Save Draft” option but specifically updates the existing draft or published post/page with the changes you have made.
5- Republish:
Once you are satisfied with the changes and ready to update the original post/page with the revised content, use the “Republish” option. This overwrites the original post/page with the updated content and publishes it on the frontend.
By following the above sequence, you can manage revisions, make modifications, and publish updated content.
Further reading:
Notes
Add notes here
Save all Images to – use ..\Sync\..\Documentation\Documentation Guidelines\Rewrite & Republish\